This is a fresh easy tutorial about Angular 7, for those to never use angular before, so go ahead to get started!
Setup
First of all, we need to already have node and npm install in your local environment. For this example we are using: npm6.4.1 and node: 10.10.0 . Also you need to install globally angular command line, for that we need to donpm install -g @angular/cli.
So thats all! now we jump to create our first the project running ng new ng7 .Then we need to decide if you want to add routing, for our example we will need to choose YES to install it, and then we will use SCSS for style sheet so we click select that too.
The following example you can take a look in the following repository: repository:https://github.com/Jero786/angular-7-medium
Jumping to the code
So, we already create our fresh Angular project, then we need to start running them, for that we will execute ng serve -o , which will open our browser.


Perfect! your project will looks like pretty much like the following:

The appfolder, will all your componentes.
The index.html that is the root of your application, which will contain the app-root . There will be insert the entire application.

If you take a look app.component.ts you will see in the line 4, that the selector it’s pointing the app-root shown above. That means this is our main component that will insert all our app content in the app-root main directive.

As you can see, inside app.component.ts you can show the @Component which is a object with a set of configuration, and it’s called decorator. There you will able to define, your template file, your style file and also, of course, your selector which is the reference in that case that is declared in the line 12 of ourindex.html.

For more details please take a look the doc reference.
Creating our first components
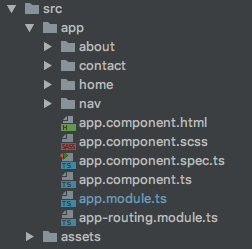
Okey, move on! Let’s create our first component using the angular command line: ng generate component nav . That will create a Nav component. (a shorter way to do the same, we could do also: ng g c nav) And will repeat the same to create about, contact and home component as well. So your structure folder at this point, should looks like the following:
Perfect! well done, then move one to start to import our component in the main home page of our app. For that, go to the /src/app/app.component.html and let only the last line, and include <app-nav></app-nav>. So, after change it, should look like the following picture:
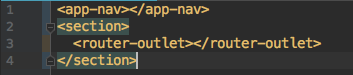
Note: we added a section tag element to apply then some style on it.
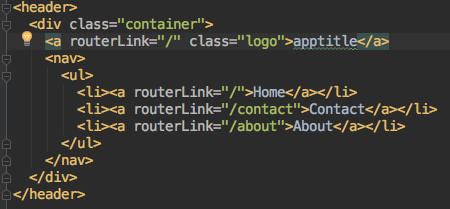
Then go to put some HTML in our src/app/nav/nav.component.html component
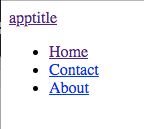
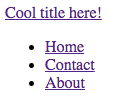
After save, and go to your open tab browser at localhost:4200 , you should look something like the following:
Pretty simple right? well, we will start to set some template values in our very dead simple example by interpolation. For that go back to our nav component and then we will change the line 3, adding {{appTitle}.

And then we will go to our class component src/app/nav/nav.component.ts and declare appTitle variable inside the class in the line 10. So in that way we should look our class component in the following way:

Well, nice! now our page shows the value that we define on it, which is Cool title here!
Setting routers
Okey, at this moment, we have very basic pages, but we are not able to navigate between our component. So for that, we need to say to angular which link or sub path belongs to each component that we already created them.
To do that, we need to define our routes in the following file: src/app/app-routing.modules.ts . There we will define all our routing configuration. In that file we will import and define all our router pages, in the following way:
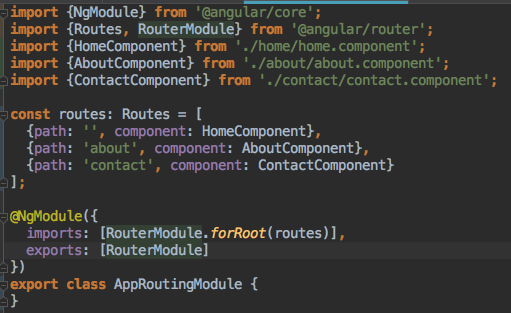
As you see, we define in the array of routes each path and each component related to that path. Perfect!! For more detail about routing, please take a look the following link.
Handler basic events
Now we can bind some basic events to our component, in order to get some user interaction on our example. We can go to the home page view component,/src/app/nav/home.component.html and we add a button.
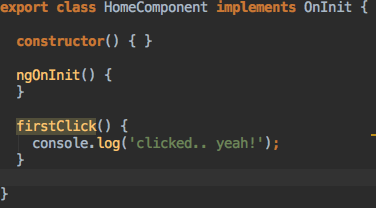
And then associate the firstClick method, in out html component.

And that it’s all! for more information please take a look the following link.
Attribute Binding & Class binding
Now, what start to add some class style in our component which will depend on the user interaction. So basically we want to change the class of our component, based on some flag boolean return TRUE or FALSE. Let take a look our code in our view src/app/home/home.component.ts
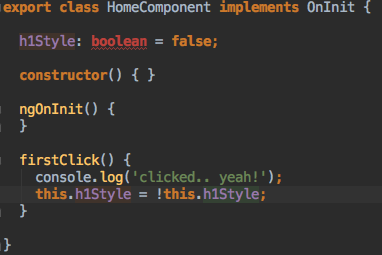
Then we change the view. src/app/home/home.component.html

And then finally we add the classsrc/app/home/home.component.scss
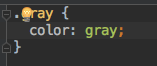
Then, when you click in your h1 title, the color will toggle between black and gray. Perfect! :D
Handler multi class style by attribute
In case that we want to change more than one class, we will need a custom angular attribute called ngClass . Let change our example in order to start using it.
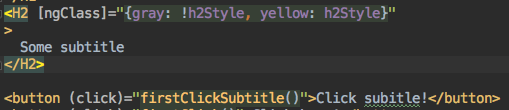
And that it’s all! you handler more than one class, based on a new flag called h2Style.
Changing the inline style
What if we just want to change a inline style attribute, which will depends on the same var that we already use on the title called h1Style.

Now our label will change the color as well when change the flag value.And if we want to change multiply styles, we will do the same as class.

Angular services
So, what happen if we want to follow DRY, and just create a unique fistClick method, and then call it from several components?, well Angular Services, allow us to have a code, that should be accessible for multiple components in a central location. Perfect, go ahead to create our first services.

Then we will se that we have two news files called src/app/data.services.ts and their test.
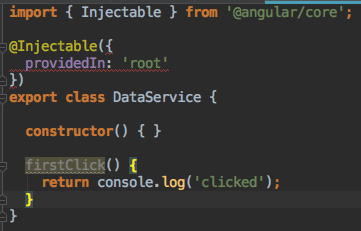
As we see, now it’s declared in our service the method firstClick method.
The last thing that remain it’s import that method in the components that we want. For instance hour home component.
Basics HTTP request
Well, now we want to add support to perform simple HTTP request into our app. For that, we need to import the @angular/common/http module, that allow us to do it.
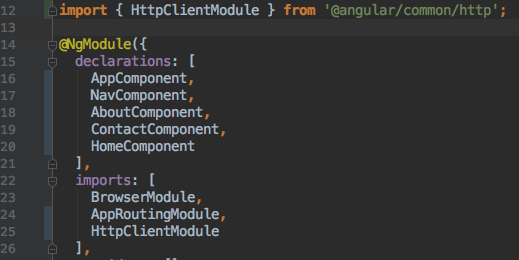
Go to src/app/app.modules.ts and then, import the module. In the line 12 then we need to include in the array of imports fo the line 22 .
Then, only remain just use it from our services layer.

You will se how to import in line 2 and then add a method namd getUsers in line 11. Then we move on to import into our home component the list of users.
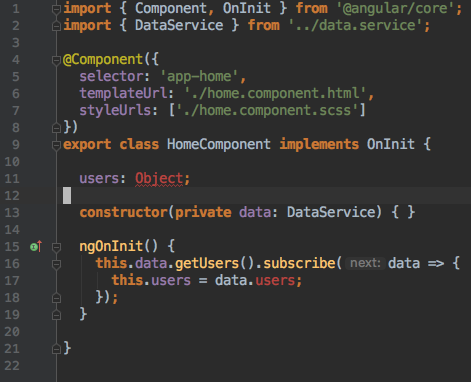
We Inject by constructor in line 13 the Data service. And then will be available in line 16 to be used as this.data.getUsers() .
Then finally we will use out fetch data, our UI component.

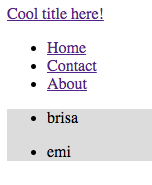
In line 1 we ask if we have users In case that already exist, we move on to iterate and render each user name in line 2 . And that’s all! we will rendering the 2 items ("brisa", "emi")that fetch and print in our home page with some gray background color.
Working with forms
You have two kind of form in Angular, Template Form and Reactive Form.
Reactive Form:
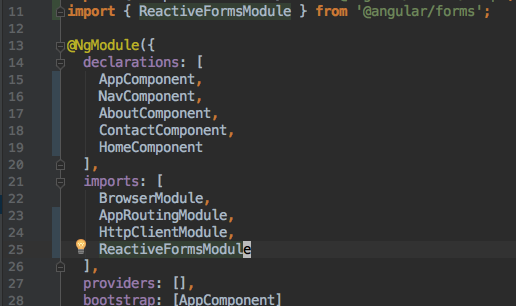
First of all, we need to import into our modules in the src/app/app.module.ts . And you will see how in the line 11 and line 25 it’s included:
Go to the component in the file src/app/contact/contact.component.tsthat will use our ReactiveForm.
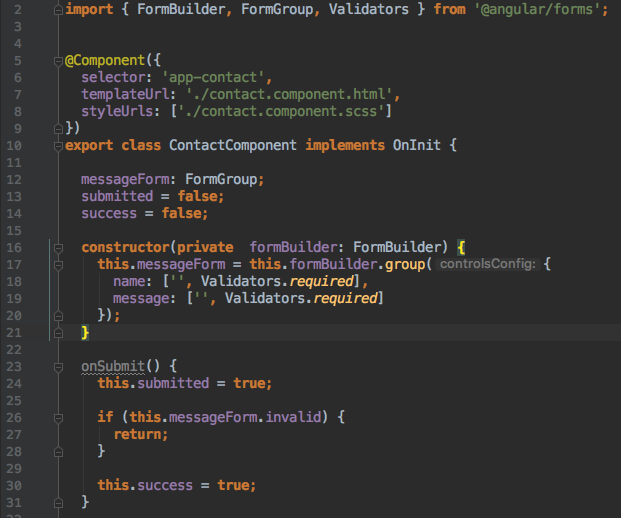
As we see in the image above, in line 2 we import the forms dependency needed. Then we inject by dependency the FormBuilder in line 16 . And Then we define onSubmit() . Which will take care the submit form operation.
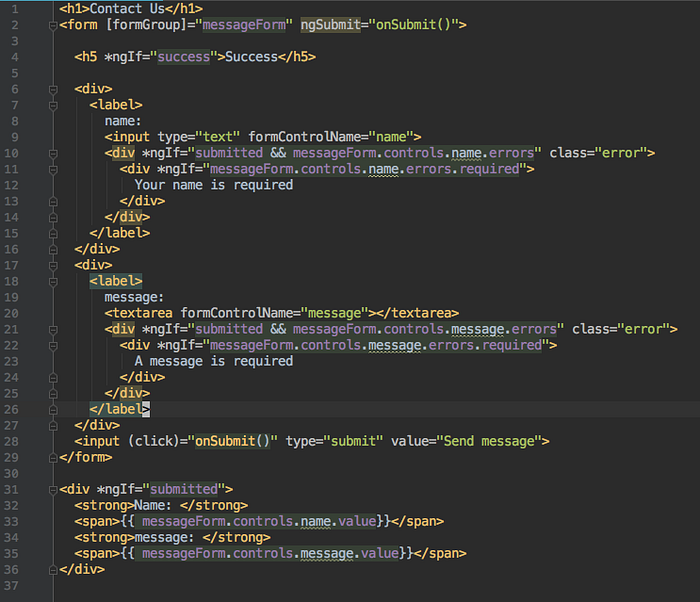
Okey, in the image above in the line 2 we are using event binding to link our onSubmit method with the submit of the form. In case that was submitted success, we will show the line 4. Also as you can see in the line 10, we will use messageForm.controls to validate each field of our form.
And finally we will show in the line 31 the message with the information that we get of messageForm.controls and will interpolate in the page.
If you want to clone this example, here is the link to the Github repository.
And that it’s all for now! thank you for read this small tutorial! please following me on Twitter “@jero786" And I will see the next time!